
How to Change Where Screenshots Are Saved on Mac: A Simple Guide
At Social Think, we’re focused on helping businesses make sense of their digital presence through sharp social media strategy, deep analytics, and actionable insights.
We believe that a smart, organized workflow is the foundation for driving business results—whether you’re analyzing data or just managing your daily tasks. One of the most common productivity drains we see is desktop clutter. If you’re a heavy Mac user, you know exactly what we mean: a Mac desktop covered in a lot of screenshots. Taking a screen capture on a Mac is easy, but by default, every single one saves directly to your Desktop.
This can quickly turn a clean workspace into a chaotic one, making it hard to find what you need. This article will show you exactly how to change where screenshots are saved (Mac).
We’ll walk you through two different methods, from the simple, built-in screenshot app to a more advanced technique using Terminal. Taking control of your screenshot files is a small change that can make a big difference in your productivity.
Understanding the Default Screenshot Location on Your Mac
Before we change the default screenshot location, it’s helpful to know how it works right now and why you might want to adjust it.
Where Do Screenshots Go by Default?
On all modern macOS versions, from macOS Mojave and macOS High Sierra up to the latest releases, your Mac saves screenshot images to one place: your main Desktop folder.
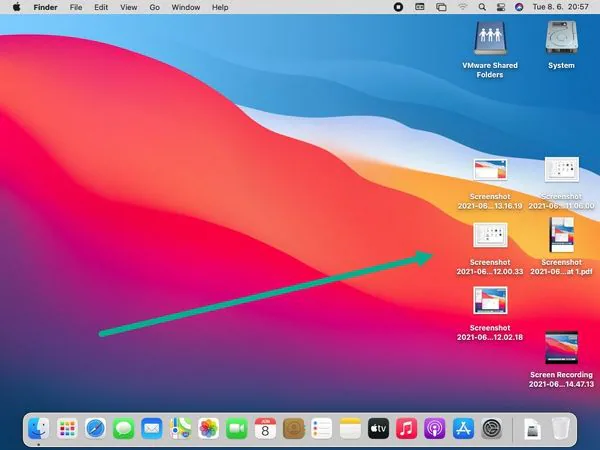
When you use the keyboard shortcuts—like Command + Shift + 3 for the entire screen or Command + Shift + 4 for a portion of the screen—you’ll see a floating thumbnail of the screenshot appear in the corner.
After a few seconds, this thumbnail turns into a file (like “Screen Shot 2025-11-05 at 4.30.00 PM.png”) right on your desktop. This is the default screenshot save location.
Apple chose the desktop folder as the default location because it’s visible and easy to access. The idea is that you’ll grab the file, use it (maybe for a social media post), and then delete it.
However, for those of us who take a lot of screenshots, this just leads to system junk and disorganization.
Why Change Where Screenshots Are Saved on Your Mac?
The primary reason is to fight desktop clutter. A clean desktop is a clean mind. But there are other strategic advantages to changing your Mac screenshot location:
- Organization: You can create a custom folder specifically for all your Mac screenshots. This keeps them all in one tidy place, separate from your other work.
- Workflow: You can set your new location to be a folder for a specific project. If you’re capturing images for a report, you can save them directly to your “Project Report” folder inside your Documents folder.
- Cloud Access: You can set the save location to a folder within your iCloud Drive or another cloud storage service like Dropbox or Google Drive. This provides an instant backup and allows for seamless sharing of your screenshot files across all your devices, including different Mac models like a MacBook Air and a MacBook Pro.
Easiest Way: How to Change Where Screenshots Are Saved (Mac) Via the Screenshot App?
For most users, the best and simplest method is using the built-in screenshot tool that Apple introduced with macOS Mojave. This screenshot app gives you easy customization options for your screen captures.
Step 1: Open the Screenshot Toolbar (Command + Shift + 5)
These are the most important keyboard shortcuts to remember for this process.
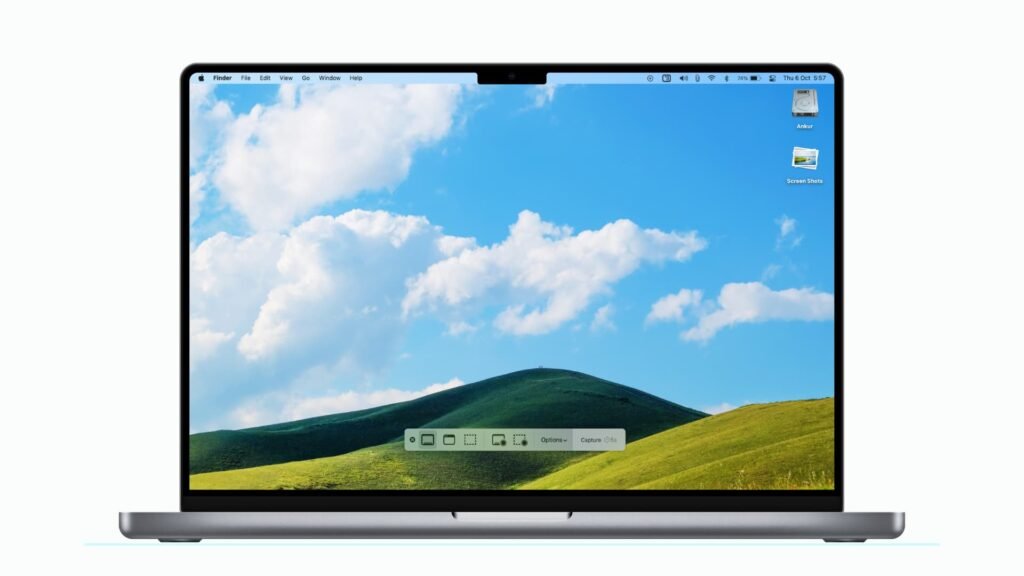
Press Command + Shift + 5 on your keyboard. This will not take a screenshot immediately.
Instead, it opens the screenshot toolbar at the bottom of your screen.
This small gray bar gives you options for capturing the entire screen, a specific window, or a portion of the screen. It’s the central hub for your screen capture settings.
Step 2: Click the ‘Options’ Menu
On the screenshot toolbar, you will see a button labeled ‘Options‘. Click it. A drop-down menu will appear.
This ‘Options‘ menu is powerful. It’s where you can set a timer, choose to show your mouse cursor, and, most importantly for us, select your save location. You can even change the file format here, though most users stick with the default PNG.
Step 3: Choose Your New Location Under ‘Save to’
Inside the ‘Options‘ menu, the very first section is labeled ‘Save to‘. This controls your default screenshot location. You’ll see a list of pre-set choices:
- Desktop: The default location you’re trying to change.
- Documents: A great option if you want to keep your desktop clean but still have easy access.
- Clipboard: This saves the screenshot to your clipboard, ready to be pasted. It doesn’t create a file.
- Mail, Messages, Preview: These options open the screenshot directly in the chosen app.
To change the default save location, simply select one of these. For instance, choosing ‘Documents‘ will make all future Mac screenshots (taken with any shortcut) save to your Documents folder instead of your desktop.
How to Use ‘Other Location’ to Select A Custom Folder?
This is where you get true control. What if you don’t want your screenshots in the main Documents folder? What if you created a new folder called “Screen Captures“?
- In the ‘Options‘ > ‘Save to‘ menu, select ‘Other Location…‘.
- A Finder window will pop up, asking you to choose a destination.
- You can navigate to any folder you want. This is the perfect time to create a custom folder. Click the ‘New Folder‘ button in the bottom-left corner of the window.
- Name your new folder something clear, like “Screenshots” or “Captures“.
- Once you’ve created or selected your preferred location, click the ‘Choose‘ save button.
That’s it. Your Mac screenshot location is now set to this custom folder. Every screenshot you take from now on will automatically save there, keeping your Mac desktop perfectly clean.
Advanced Method: How to Change Where Screenshots Are Saved (Mac) Using Terminal?
If you’re using older macOS versions (like macOS High Sierra or earlier) that don’t have the screenshot toolbar, or if you simply prefer using the command line, you can achieve the same result with the help of Terminal.
This method seems technical, but it’s just a couple of simple commands.
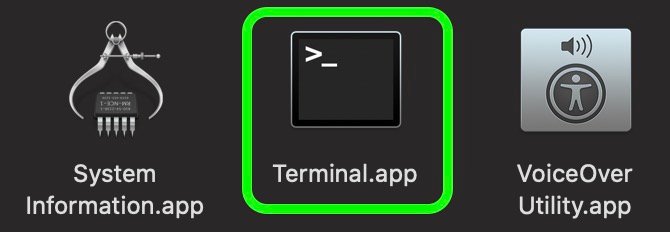
Step 1: Open the Terminal Application
First, you need to open Terminal. The quickest way is with Spotlight Search:
- Press Command + Spacebar to open the search bar.
- Type “Terminal” and press return when it appears.
Alternatively, you can open Finder, go to your ‘Applications‘ folder, and then find the ‘Utilities folder‘. Terminal lives inside the Utilities folder. Opening it will present you with the Terminal window, which is where you’ll type your commands.
Step 2: Create A New Folder For Your Screenshots
Just like with the easy method, you need a destination. You can do this in Finder, but since you’re already in Terminal, you can make one there. Let’s say you want to create a folder named “Screenshots” inside your Documents folder.
Type this command and press return: mkdir ~/Documents/Screenshots
This command creates a new folder in the exact location you specified.
Step 3: Enter the Terminal Command to Change the Default Location
This is the core of the advanced method. You will use a terminal command to write a new setting to your system settings.
Type the following command into the Terminal window, but do not press return yet: defaults write com.apple.screencapture location
After typing “location“, add a single space. Now, you need to tell Terminal the path to your new folder. The easiest way to do this without making a typo is to drag and drop the folder.
- Open Finder and navigate to the new folder you created (e.g., the “Screenshots” folder in your Documents).
- Drag that folder from the Finder window and drop it directly onto the Terminal window.
- The path to the folder will automatically appear after your command. Your full terminal command will look something like this:
defaults write com.apple.screencapture location /Users/YourUsername/Documents/Screenshots
Now, press return. You’ve just told macOS what the new location for its default screenshot files should be.
Step 4: Apply the Changes to Your System
Your change to the system settings has been saved, but the system won’t use it until it’s refreshed. You need to enter one final terminal command with the help of terminal command killall.
Type this command and press return: killall SystemUIServer
This command sounds dramatic, but it’s perfectly safe. It simply restarts the System UI Server, which manages things like your Mac menu bar. You’ll see your menu bar flash for a second, and then your new screenshot location setting will be active.
All new screenshot files will now go to your chosen folder.
How to Reset Where Screenshots Are Saved on Your Mac Back to the Default?
What if you miss the simplicity of having screenshots on your desktop? You can easily change the default screenshot save location back.
Resetting Using the Screenshot App Options
This is the simplest way.
- Open the screenshot toolbar again (Command + Shift + 5).
- Click ‘Options‘.
- Under ‘Save to‘, just select ‘Desktop‘. This resets the default save location to the original desktop folder.
Resetting Using A Terminal Command
If you used the advanced method, you can just as easily use a terminal command to reverse it.
- Open Terminal.
- Type the following command to set the location back to the desktop folder:
defaults write com.apple.screencapture location ~/Desktop - Press return.
- Then, type this command to apply the change:
killall SystemUIServer - Press return again.
Your default screenshot location is now back to normal.
FAQ’s:
Will Changing the Screenshot Save Location Affect Shortcut Keys Or Screenshot Settings?
No, not at all. Your keyboard shortcuts (Command + Shift + 3, Command + Shift + 4, and Command + Shift + 5) will work exactly as they did before. This change also does not affect your main keyboard settings or your control key functions.
It only changes the final save location for your screenshot files.
Can I Organize My Screenshots Into Multiple Folders?
By default, macOS saves all Mac screenshots to the single default location you’ve chosen. It cannot automatically sort them into different folders (e.g., “Work” vs. “Personal”).
To do that, you would either need to move the files manually after capturing them or look into extra apps. Third-party screen capture tools like Cleanshot X are built for this and offer advanced features for organization, annotation, and more.
How Do I Stop Screenshots From Saving to My Desktop?
This is precisely what this guide is for! To stop desktop clutter from screenshot images, you just need to change the default save location. Use the Screenshot app method (Command + Shift + 5 > Options > ‘Save to’) and pick any new location other than ‘Desktop‘.
The Documents folder is a popular choice, as is a custom folder stored in your iCloud Drive.
How Can I Find All Screenshots Taken On My Mac If I Don’t Remember the Location?
This is a fantastic question. If you’ve changed your mac screenshot location and forgot where you set it, you don’t need a mac care app or to dig through system junk. You can use a powerful Spotlight Search trick.
- Press Command + Spacebar to open the search bar.
- Type (or copy and paste) this exact code:
kMDItemIsScreenCapture:1 - Press return.
A Finder search window will instantly open, showing you every single screenshot file on your Mac, no matter what folder it’s in. This special query searches the file’s metadata for the “is a screen capture” flag.
Conclusion
Taking control of how to change where screenshots are saved (Mac) is a small but powerful step toward a more organized and productive workflow. Whether you use the simple screenshot toolbar in modern macOS versions or the help of terminal for more granular control, you’re now equipped to stop desktop clutter before it starts.
A designated new folder for your screenshot files makes it easier to find what you need, share images, and keep your main workspace clean.
At Social Think, we firmly believe that smart, intentional changes are the key to success.
Optimizing your Mac’s workflow is just like optimizing a social media strategy—it’s about understanding the tools you have, analyzing your habits, and making insightful adjustments to drive better results.
If you’re ready to apply this same strategic, data-driven thinking to your brand’s social media presence, get in touch with Social Think today. Let us help you find the insights hidden in your data.